Set up Multilingual UI
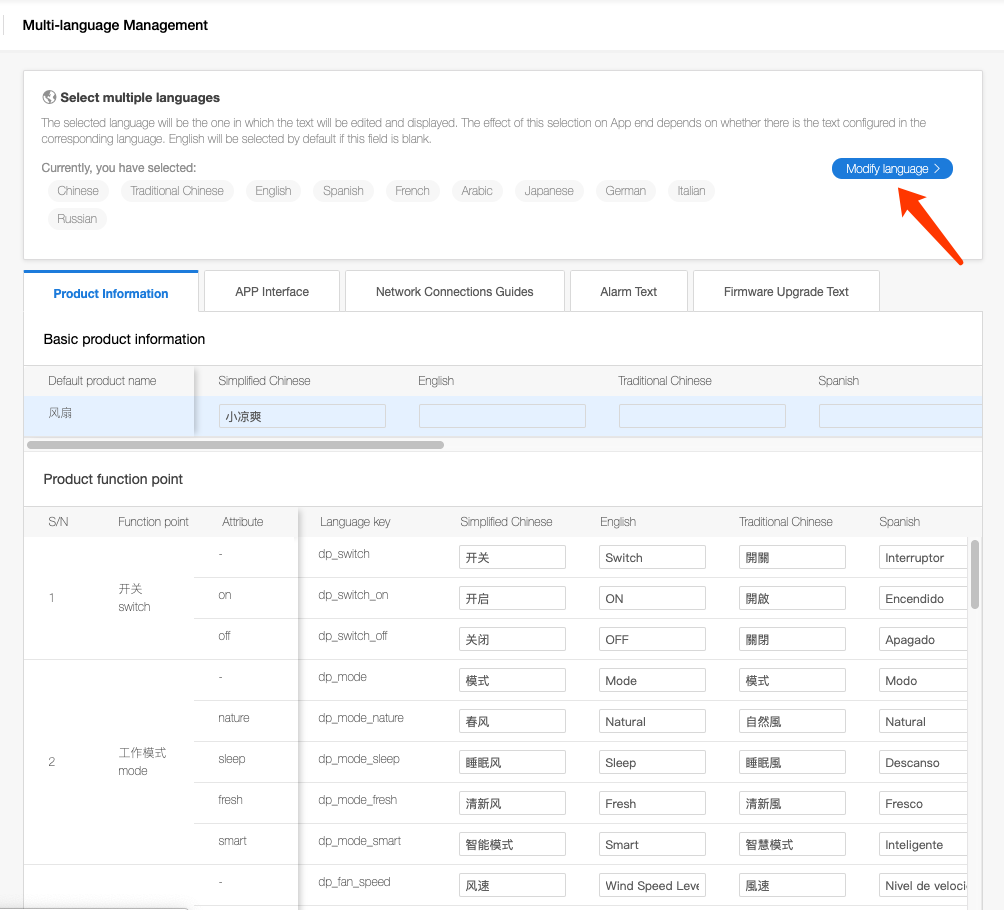
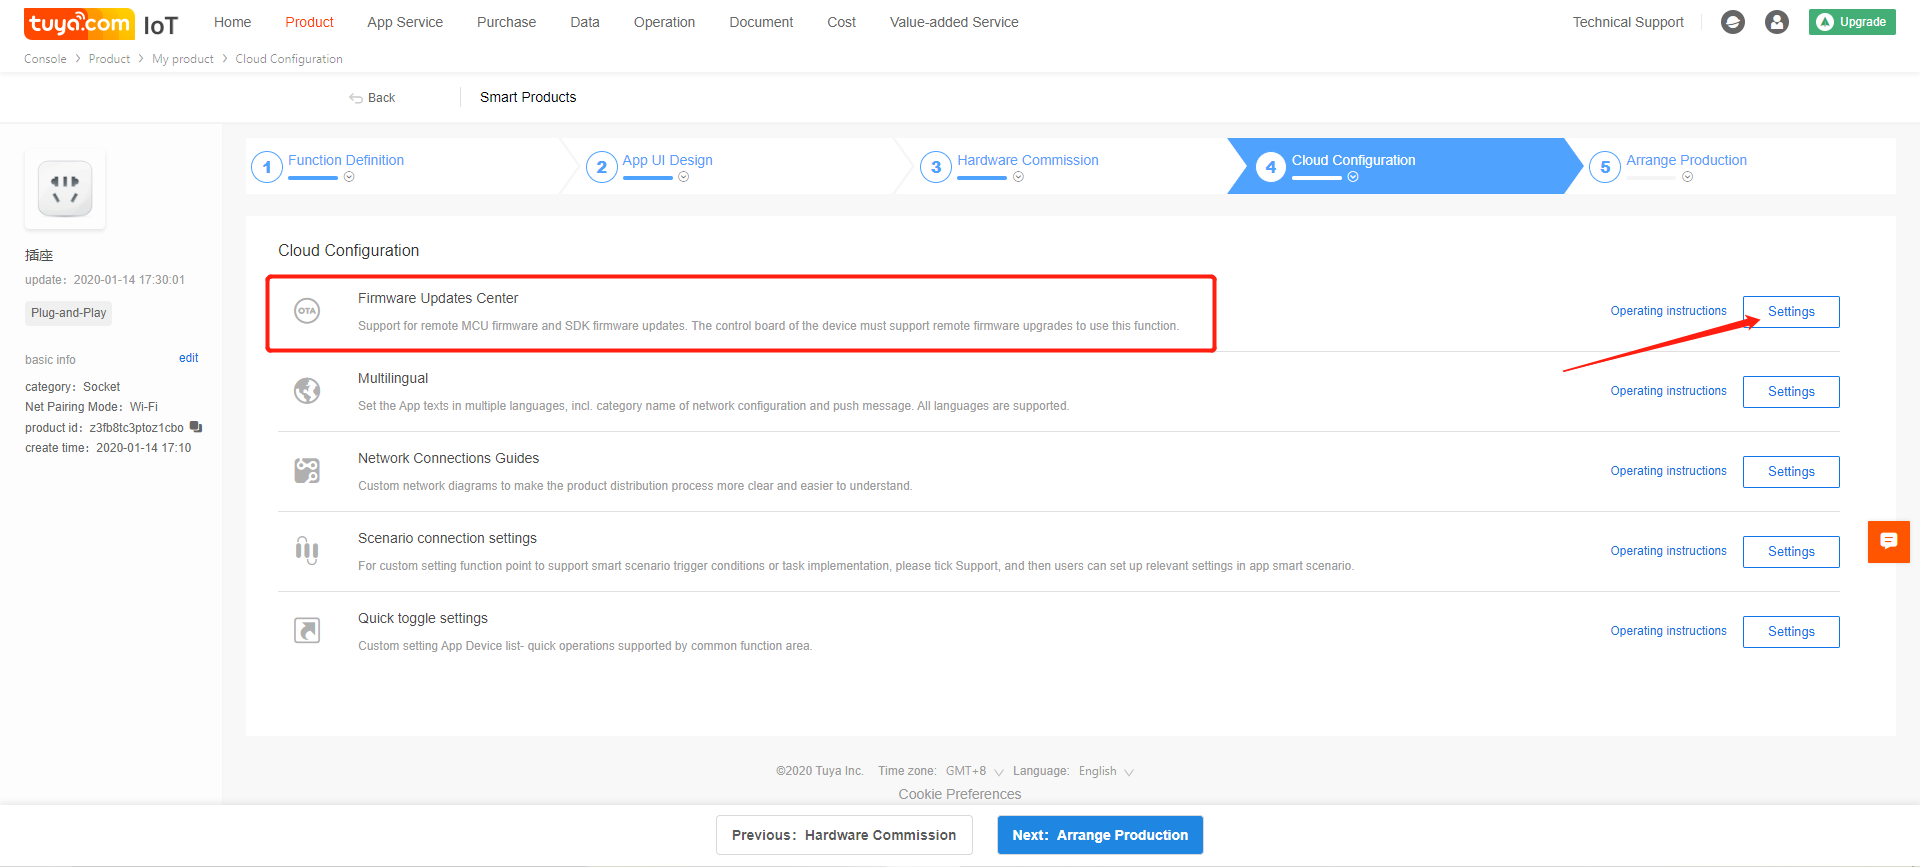
In the Product Development - Step 4: Cloud Configuration -> Multilingual section, you can set the App UI texts for the product in multiple languages based on the language of the target sales area of the product, including the multilingual texts for the Product Information, App Interface, Network Connections Guide, Alarm Text, Firmware Upgrade Text and other function points.

Select multiple languages
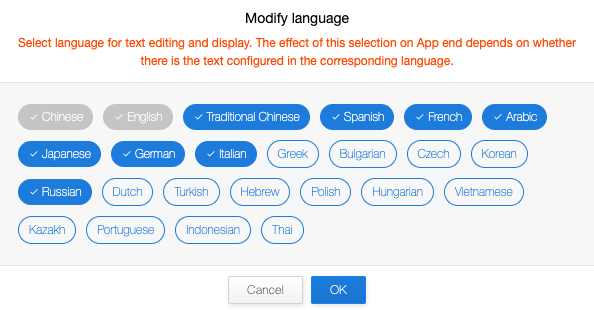
Click “Modify Language” to select the language for text editing and display. The effect of the selection on App depends on whether there are texts configured in the corresponding language. English will be selected by default if this field is blank.


For different account levels, the platform supports the different numbers of languages. For the specific languages supported, you can click the menu icon -> “Account” on the upper right corner to view.

Multilingual configuration for the Product Information
Multilingual configuration on the Product Information includes: Basic product information and Product function points.

Basic product information
Taking Smart Fans for an example, in the Basic product information section, enter the default name of the product: “Little Cooling” and click “Save”. The display effect on App is as follows:

Product function points
Taking function point 2 - “mode” as an example. The function name is shown in the first line, and “Natural”, “Sleep” and so on shown below are the options under this function.

Now change the “Mode” in the first line to “Working Mode” and the first option “Natural” to “Spring”, and click Save. Then scan QR code to view the display on the app, as shown in the following:

Language management for non-functional points
If you set the relevant functions about your product in: “Quick toggle settings -> Common functions settings”, for example, the common function about wind speed is enabled, then you can see the section of “Language management for non-functional points ” on the multilingual management page.


If modifying the texts about wind speed, for example, “Level 1, Level 2, Level 3, Level 4” are changed to “low speed, medium speed, high speed, super speed”, then the display effect on App is as follows:

Multilingual configuration for App Interface
If there is any text that cannot be found in the Product Information, you can find and edit it in the App Interface module. After editing, you can preview the App dashboard. If the text on App is not changed accordingly, you can clear the cache in the App settings, or kill the App process running in the background and re-scanning the QR code to preview again. If fail to preview, please submit a work order in the "Submit your question" box at the top of the homepage of the Advanced Features. We will assist you for modifying.

Multilingual configuration for Network Connections Guide
The Tuya Smart IoT platform supports the client using OEM App to customize network connections information; Public Tuya Smart App and Smart Life App platform provide the same network connections information.
Configuring multilingual texts
Here, you can customize the “Network connections guide icon”, “Network connection instructions”, “Button text” and “Title of help article” under two network connections methods: SmartConfig mode and AP mode.

The display on the App is as follows:

The texts for network connections here are linked to the contents in Step 3: "Hardware Debugging -> Network connections setting" of product creation. Please fill in according to your settings. According to the settings in the following figure, under the SmartConfig mode of texts for the network connections, you can write as follows: power on the device, and then press and hold the reset key for 3 seconds until the indicator light rapidly blinks.

You can customize pictures for network connections, button texts and help texts as needed.
Binding pid in OEM App settings
In "Function -> Network distribution device list" of OEM App, select "Custom category" to create a custom category.

Associate the products you have just customized for network connections guide, and provide a category name.
Multilingual configuration for Alarm Text
Create new alarm
In Step 4: Advanced Features -> Alarms Management, you can create a new alarm trigger, such as alarm about camera’s moving.


Multilingual configuration for Alarm Text
After creating, go to the “Alarm Text” page. Here you can set the multiple language settings for alarm texts.

Multilingual configuration for Firmware Upgrade Text
Create new firmware
In Step 4: Advanced Features -> Firmware Updates Center, you can create a new firmware.


Multilingual configuration for Firmware Upgrade Text
After creating, go to the “Firmware Upgrade Text” page. Here you can set the multiple language settings for firmware upgrade texts.

Last updated